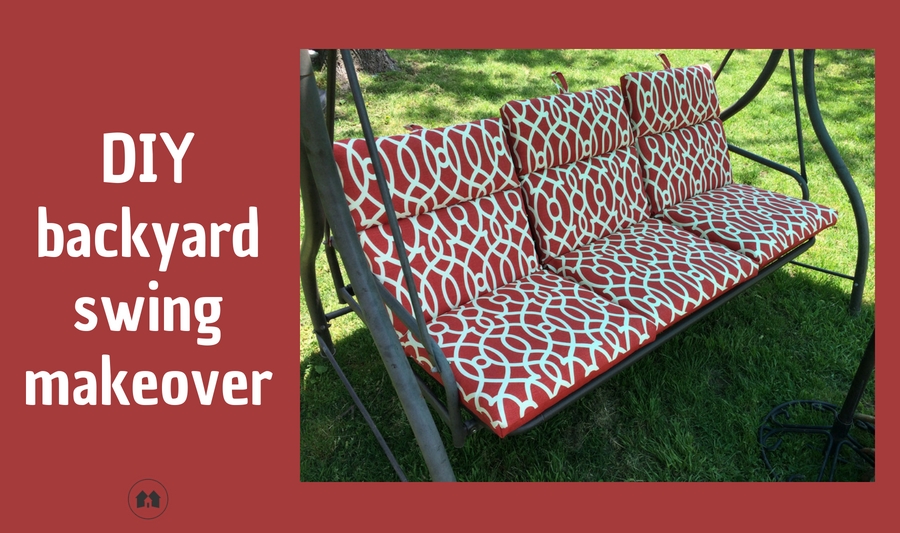
Everyone deserves a little rest and relaxation. Your man is no exception. With the warm days of summer upon us, it’s nice to have a place to hang out in the backyard and relax. Whether you are watching the birds or the kids, or just having some quiet bonding time with your spouse, it’s nice to have a comfy spot.
We’ve had a couple different cloth backyard swings, and they’ve been great … but after a year or two, the weather just rots the cloth away. Our current swing was no exception. The last straw was me sitting on it and hearing it rip! Luckily I didn’t fall through it, but I knew we could no longer trust the old cloth. This time, instead of saving up to buy a new swing, I decided to renovate the one we already have.
This is a great way to surprise your husband for Father’s Day. If you don’t already have a swing, you might find one at a yard sale or thrift store. Maybe a family friend or neighbor has one sitting in the garage, waiting for the junk pile, that they’d be happy to give away!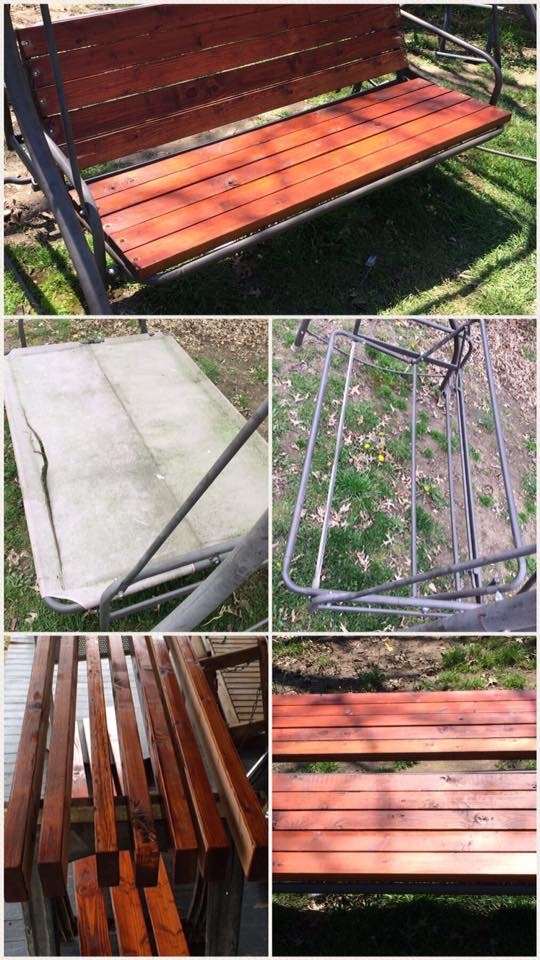
The first step: cutting off all the rotten cloth. The same wear and tear that weakened the fabric made this easy enough.
Next, I had to measure the length and width of my frame. My swing has a feature where the back can lay down, creating a flat bed (similar to a futon). I enjoy that, so I wanted to make sure my wood wasn’t too close to the hinges to prevent it from moving up and down.
Instead of cloth, I decided to use wood, hoping it would last much longer. I wasn’t sure what type to use, and considered a few different kinds. Cedar and redwood are wonderful outdoor woods, but they were too expensive for me, so I decided to go with poplar. I read it was rot-resistant and would hold up in the weather. I’m no carpenter, but it sounded like a decent choice, and the cost to buy it locally was only about $7 for a 12′ board. Cut in half, each one would provide two pieces in the size I needed (and, as it turned out, the gentleman at Lowe’s was kind enough to cut them to fit my swing’s frame). To complete the project, I ended up needing five 12′ boards, cut in half, for a total of ten 6′ lengths of wood.
Next came picking a wood stain. I’d never actually stained anything before, so I decided to go with an all-in-one product that didn’t need a finish coat on top. (I chose Olympic Elite advanced oil-based stain and sealant in one.) The whole project required barely half of a small quart-sized can. Oil-based products take longer to dry, so pick a warm, sunny day to speed up your drying time. I put two coats on each side; you’ll want to use as many as you need to get the color you desire. Remember, the color will be a tad darker once it’s dry. My biggest issue with this step was being careful not to let the stain run on the sides while I was staining. Make sure you brush the sides carefully when you are done with each coat so you won’t have any runs. If you do, and can’t hide them, you could always sand that part down and redo it later if it bothers you.
My swing’s frame is steel, so I decided to use self-drilling screws. With this type, you aren’t supposed to need a pilot hole, but after repeated attempts, I ended up drilling a small one. Not sure if I just wasn’t strong enough to do it without them, or if it happened because the poles (where I was drilling into my frame) were rounded, but the small pilot holes made the job much easier.
You will want to countersink your screws so they won’t stick up out of your swing. This means you drill a shallow hole just bigger than the head of your screw, so it will be inset in the wood.
Once your boards are stained and pre-drilled, the final step is to screw the boards onto the frame. Having two people for this part of the job — one to hold the boards in place while the other attaches them to the frame — is very helpful. You’ll want to leave a small gap between the boards to allow for swelling in the rain.
If your swing originally came with cushions, you should be able to reuse them. Otherwise, they can be purchased at just about any store with a Lawn & Garden department.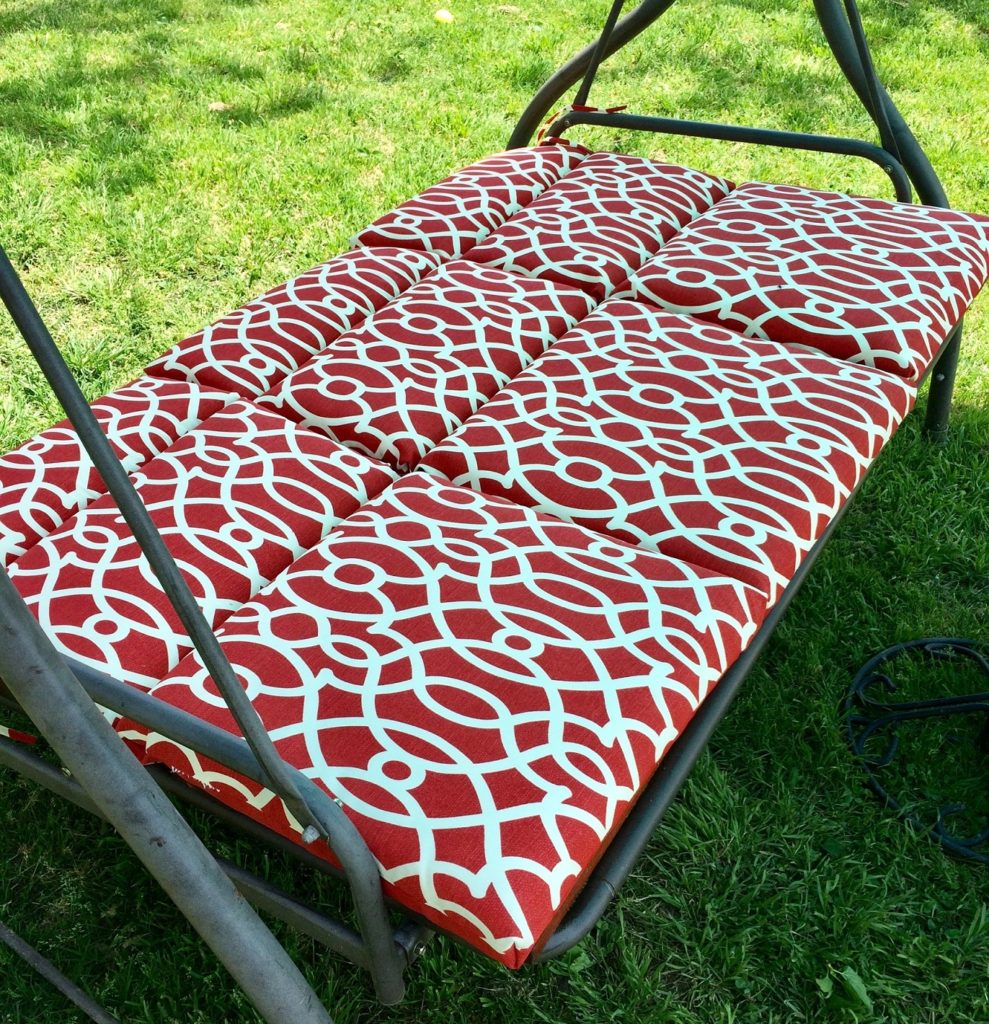
That’s it. Give yourself a pat on the back … that old swing has officially had a makeover! For a fraction of the cost of a new swing, you’ve just extended the life of something that otherwise would have ended up in a landfill, and created the centerpiece for a relaxing backyard nook — and you did it with your own two hands. What a fantastic Father’s Day surprise!
I’m impressed –What a great DIY! Now we all need to start scouring garage sales or keeping eye on our neighbor’s trash pile! 🙂
Haha, 😋 Thanks!