All of my children have enjoyed making crafts (and still do). There is such a feeling of accomplishment and excitement when creating something cool with your own hands. Crafts using my children’s actual handprints are especially sentimental to me. I still have a set of my own handprints someone helped me make when I was five years old. My children have had fun over the years comparing their handprints to mine.
Today I’d like to share an adorable spring flower craft I ran across on the website OneLittleProject.com.
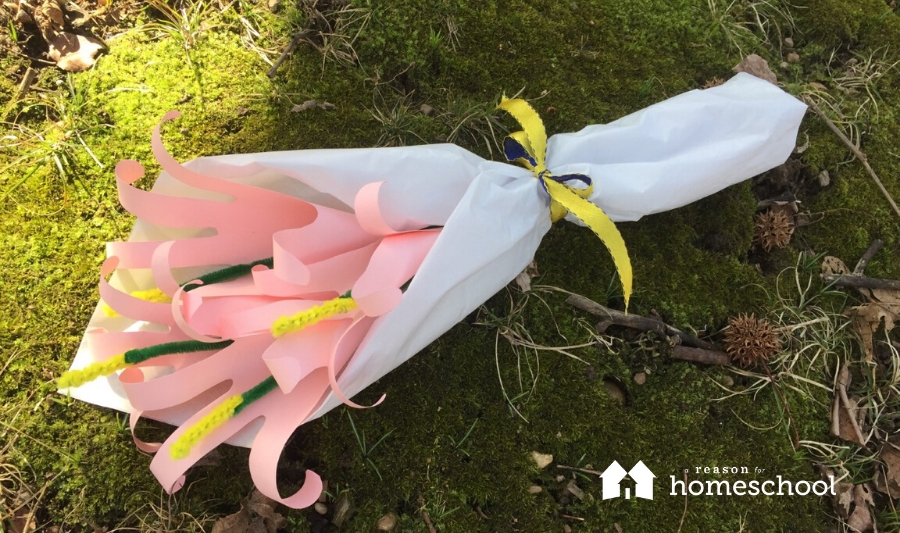
For this activity, you’ll trace and cut out your child’s handprint, then transform it into a beautiful paper lily. It uses inexpensive supplies and is easy enough for even the youngest children to do with a little guidance. Why not make a few and create a bouquet that would be perfect for cheering up a neighbor or friend, or as a creative Mother’s Day gift? This is also a great activity for Sunday School classes or when your kids get together with friends.
Supplies:
- paper
- pencil
- scissors
- tape
- green and yellow pipe-cleaners
Crafting instructions:
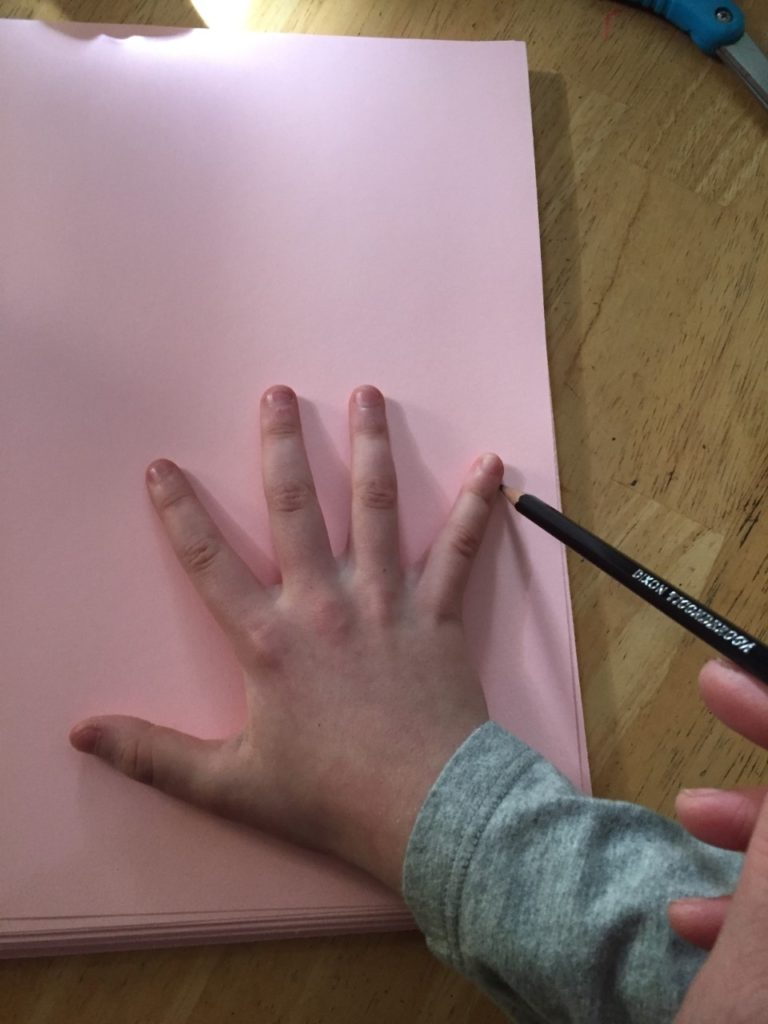
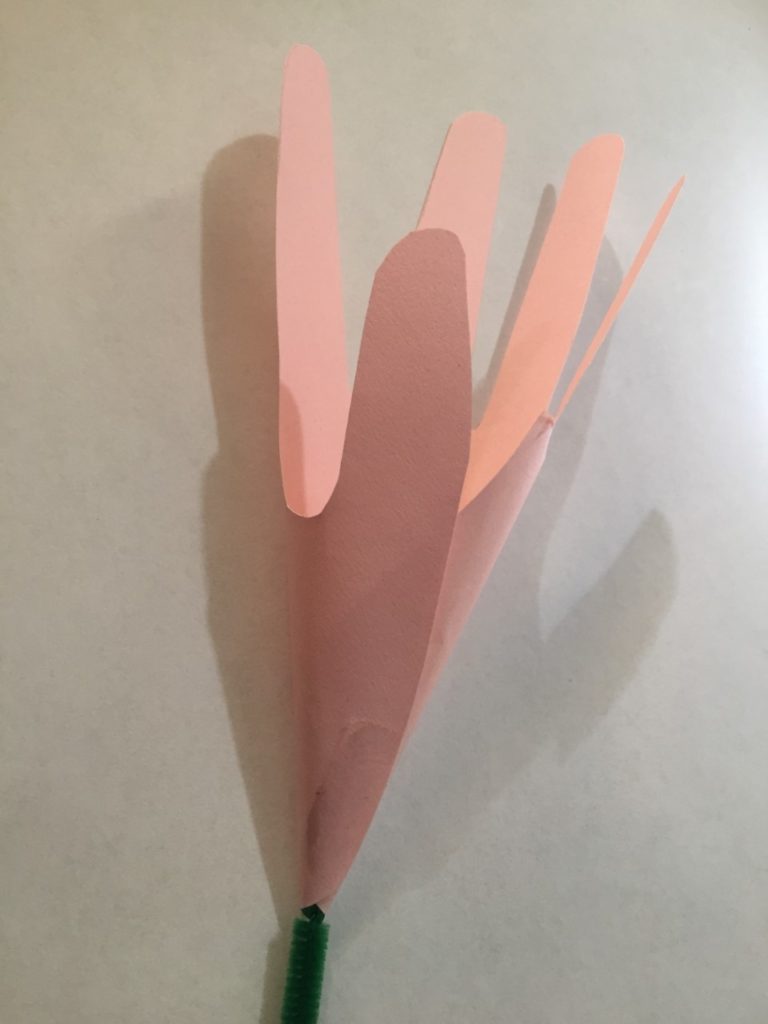
- With a pencil, trace each child’s handprint onto your paper. We chose to use pink but you could use any color you have or like; even regular white computer paper would make beautiful white Easter lilies.
- Carefully cut out your handprints.
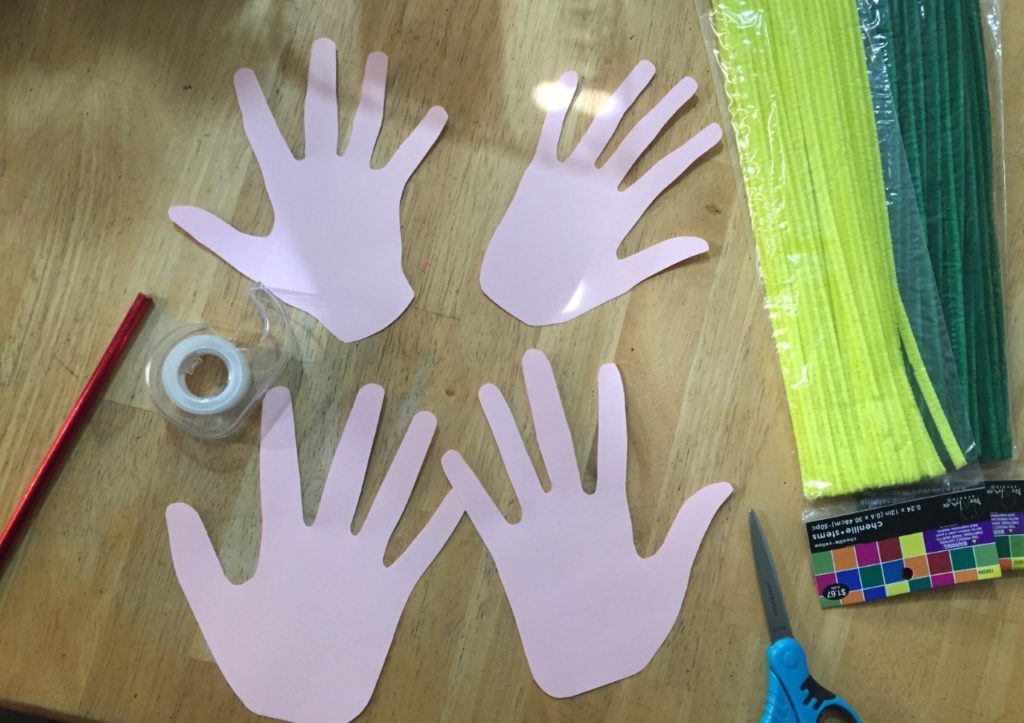
- Wrap the base of each cut-out handprint into a cone shape, and secure with a small piece of tape.
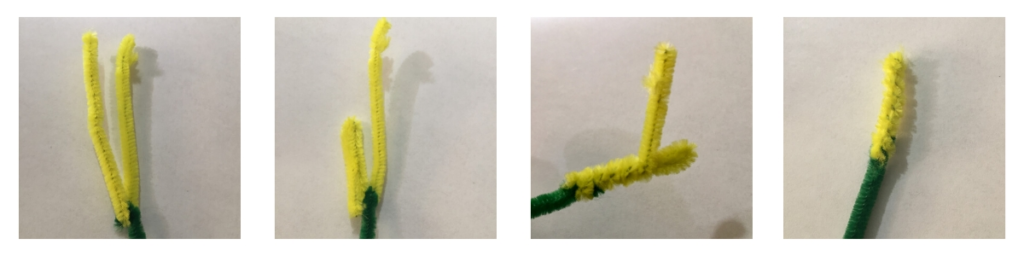
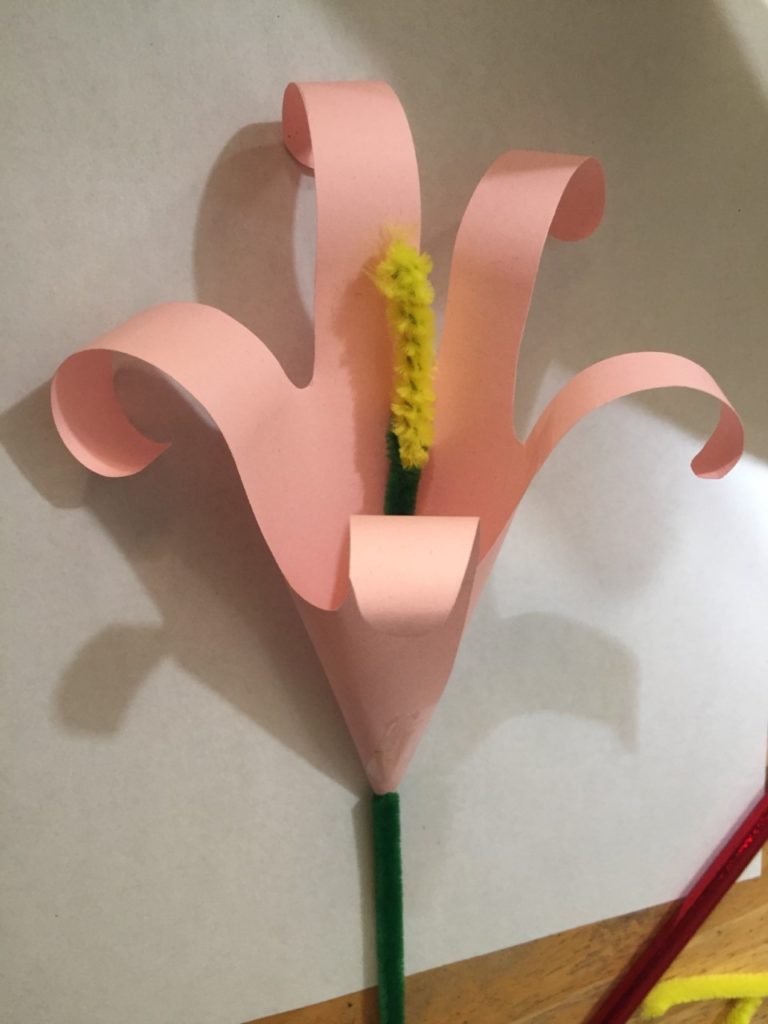
- Take a standard size green pipe-cleaner and fold the top over making a small hook shape. This will be your stem.
- Take a yellow pipe-cleaner and cut it in half. You will need a piece 5-6” long. Fold it in half and tuck it into the hook you made on the end of your green pipe-cleaner. Give them a good pinch to hold them in place. Next take one of the pieces of yellow you folded in half and fold it down in half again. Then take the other longer piece of yellow and starting at the base, twist it around the folded yellow end working your way up to the top to make your flower’s style.
 (Are you’re wondering, “What’s a flower’s style?” These free, printable 3-part cards, inspired by Montessori teaching methods, are great for helping your kids learn the parts of a flower — and maybe even brushing up on your own knowledge!)
- Slide the pipe-cleaner through the hole at the bottom of your paper handprint flower, with yellow style side up.
- Using a completely round pencil — sorry, homeschool moms, the amazing Ticonderoga No. 2 won’t work here, because its flat, cornered hexagon shape will leave weird lines in your petals — roll the paper over the pencil and down the finger like you’re curling hair. No need to hold it, the paper curls immediately. Repeat with each of the five fingers / petals of your flower.
- Gather as many as you’d like (I did four, one for each of my children) and tie them into a gorgeous bouquet. If you have some tissue paper stashed away you could even wrap up the stems like a flower shop would. Add a bow to your bouquet of paper lilies to finish it off nicely.
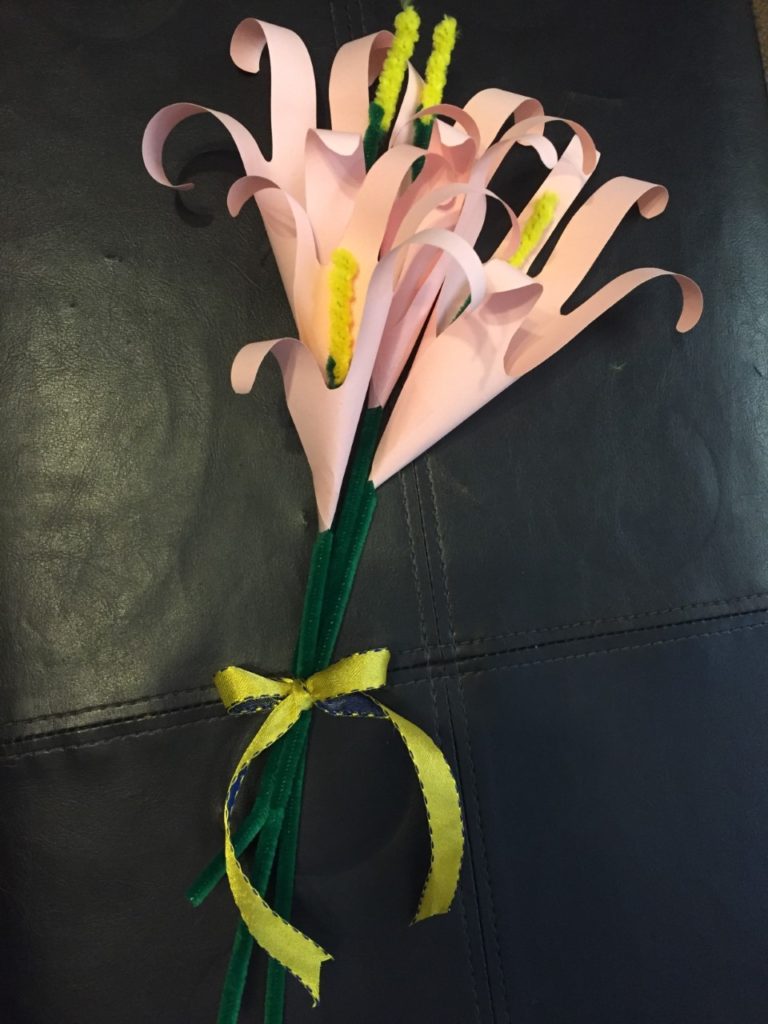
Family, friends, and special neighbors would all be thrilled to receive such a beautiful gift of love. Happy crafting!
Looking for Easter crafts?
Consider this planter centerpiece
or these salt dough ornaments!

These ideas are soo cute.
I’m going to try them with the Grands.
Who diesnt love Rainbows and Flowers.
I think I’ll let them decorate my big window with them.
Love it! 🥰👍