Love this vacuum experiment? For a limited time, visit our sponsor’s online store
to receive 20% discount on all A Reason For Science products with promo code SCIENCEVAC20!
For a typical homeschool family, experimentation is part of everyday life. You can probably walk through the house right now, and find your kids in the middle of an “experiment” (or three…) of some sort. They might be building a tower with blocks, or dropping Mentos into a bottle of Coke — outside, hopefully! — or taking apart the DVR that stopped working. In all these cases, they’re exploring the world around them, testing their ideas. Experimenting.
Giving them freedom to explore on their own is crucial, but when it comes to certain subjects, you can’t overestimate the value of an organized, intentional plan of study. Science is one of those subjects. That’s because understanding basic concepts of life, physical, and Earth science is an essential foundation for higher learning.
Today is National Create a Vacuum Day, and I recently came across a fascinating experiment that’s perfect for the occasion, so I wanted to share it with you. This comes from Level C, Lesson 17, of the A Reason For Science® curriculum. In this experiment, we’ll use changes in air pressure to create a vacuum inside a 1-gallon glass jar.
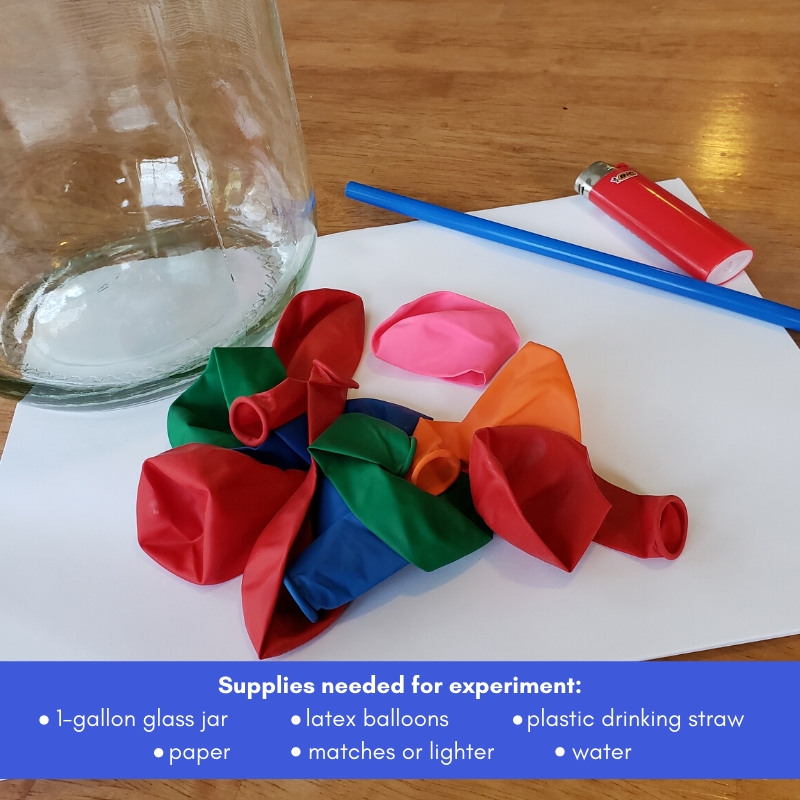
To create a vacuum on your own with this experiment, you will need:
- a gallon-size glass jar (if you’re a fan of pickles, most Walmart stores carry a 1-gallon size like this one)
- a sturdy plastic straw
- balloons (I suggest having more than one on hand, just in case — and good quality, 12″ latex balloons work best for this experiment)
- water
- paper
- a lighter or matches
Begin by setting the gallon jar on a stable surface like a table or countertop.
Fill the balloon with water until it is larger than the opening of the jar. (The trickiest part for me was getting the right amount of water in the balloon! Too little water and the balloon will end up in the bottom of the jar. You may need to try a few times … thus the suggestion of having multiple balloons on hand.)
Carefully try to press the balloon through the opening; it should be large enough to resist when you try to gently push it into the jar. Don’t force it! Let your kids each take a turn so they’ll see that the balloon doesn’t slip easily inside.
Next, crumple a piece of paper and drop it into the bottom of the jar. Using a match or lighter, carefully light the paper on fire, then quickly place the balloon over the mouth of the jar, and watch what happens!
Once the flame is extinguished, try to pull the balloon OUT of the jar. Give your kids a turn this time, too. You’ll find that it’s very difficult, if not impossible, to remove the balloon without popping it! (In the video below, the power of the vacuum is evident when we try to remove the balloon from inside the glass jar.)
Take a sturdy plastic straw, carefully insert it between the water balloon and the mouth of the jar, then push it inside. After just a second or two, you should be able to remove the balloon.
So … what happened? When you lit the paper on fire and placed the water balloon on top of the jar, the balloon began to shake. It seemed almost as if it was “jumping” up and down. This occurred because the flame heated the air, causing the molecules to expand. As the air pressure inside jar rose due to the heat, air was forced past the balloon that was sealing the mouth of the jar. When all the oxygen was gone, the fire went out. Without a flame, the air inside the jar began to cool and the molecules contracted. Because so much of the air had been forced out while the fire was burning, the air pressure inside the jar became lower than outside — also known as a vacuum! — and in turn, the water balloon was pulled into the jar.
Inserting the plastic straw allowed air to flow through and equalize the pressure. With the vacuum gone, it was eventually possible remove the balloon.
One of the things I really love about A Reason For Science® is the structure of the lessons. My daughter once told me that she doesn’t like science experiments. In her words, “You spend so much time learning about something, and by the time you do the experiment, you’re just sick of it and it’s boring.” But this program changes the typical approach, by starting each lesson with an experiment on Day 1. Kids first observe the science in action, then spend the rest of the week analyzing and talking about what happened and why.
In addition, I’m so impressed by the way the lessons are laid out for the teacher. There isn’t a ton of advance preparation, because everything you need to know is right there in the book. There are scripts for explaining concepts, extended learning ideas when you really want to delve into a topic, and even a section called “Teacher to Teacher” with interesting tips and bits of information (you know, to make it sound like Mom actually knows her stuff).
And speaking of advance preparation, the Materials Kit for this science program is THE. ABSOLUTE. BEST. With the exception of a few household items (like eggs or water or other things you’re bound to have on hand), the supplies for all 36 weekly experiments are provided, and stored inside a convenient, sturdy plastic box. The days of running to Walmart on Sunday night for an obscure item — “Excuse me, ma’am, where can I find the iron shavings and 8 millimeter rare earth magnets?” — are over. Hallelujah.
This curriculum excels at giving kids a great foundation in science. While our family falls squarely in the “relaxed” homeschooling camp, in our 16+ years of home education I’ve come to believe in the necessity of a framework for learning. It’s the best way to be certain your kids will be exposed to the things they need to know. A Reason For Science® introduces and thoroughly explores the fundamental scientific concepts students must master before moving on to high school and college courses. Every year — Levels A-H are equivalent to 1st – 8th grade — they spend nine weeks studying each of the following areas: Life Science, Earth Science, Forces, and Energy/Matter. And because their lessons are hands-on, they actually see the science in action, instead of simply reading about it.
I also love the fact that every week ends with a section called “Food For Thought,” which gives a scripture passage and a relevant connection to the lesson. For example, this one includes a Bible verse (Matthew 19:25-26) followed by this insight: Looking at their own efforts, [the disciples] can’t see how it’s possible for anyone to be saved. But Jesus reminds them that the answer is to trust God. The impossible doesn’t happen because of what we try to do, but from relying totally on God’s power. Connecting the science experiment with a biblical truth is a win/win, in my book.
They say nature abhors a vacuum, but your kids won’t feel the same about creating one! Why not help them celebrate National Create a Vacuum Day with a science experiment? This activity will inspire their curiosity and demonstrate that learning science can be fun … especially when it’s hands-on!
Do your kids LOVE science?
Visit our archives for fun, engaging activities,
including lots of free science printables!
Visit our sponsor’s online store
to download FREE samples of A Reason For Science …
and for a limited time only, receive a 20% discount
on all Science resources in the store
with promo code SCIENCEVAC20!

