New life is exploding everywhere around us. The flowers and trees are budding out—with no regard for my allergies, I might add. I do appreciate the fresh peaches and blueberries come June, though, so I guess I’ll have to suffer through. My sister is anxiously awaiting and welcoming her new baby lambs, our annual trip to the local safari is in the works, and the rain is washing away the fading hope I once held for snow.
Each spring, countries all over the world celebrate Easter. While there are a wide variety of ways people choose to celebrate, the reason for the occasion doesn’t change: Christian Easter centers around the death, burial, and resurrection of Jesus Christ. From the cross to the tomb to rising again, the primary focus is Him.
The symbolism of death to our old lives of sin, and awakening to a new life in Him, is very appropriate this time of year. God tells us there is a time for everything … isn’t it fitting to celebrate life in the spring?
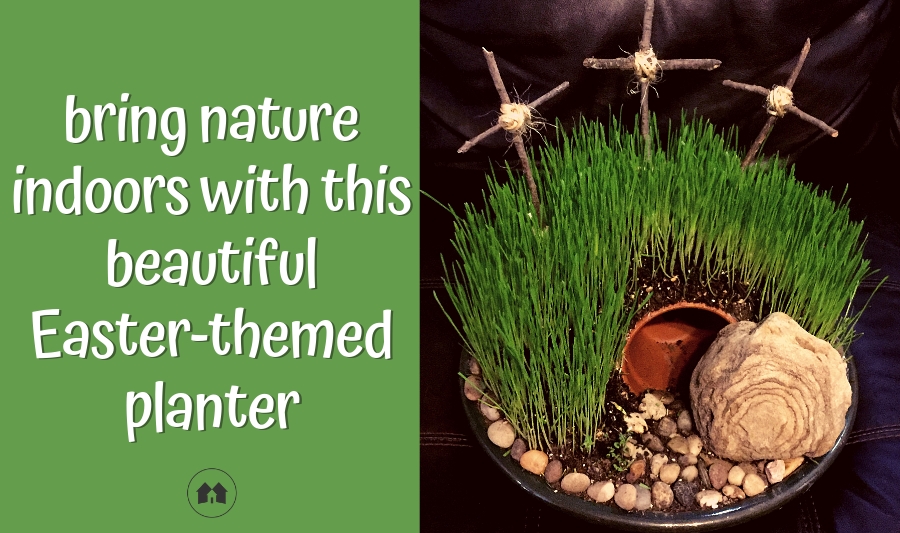
Today I want to share a fun craft for the whole family, that would make a beautiful centerpiece for your own Easter celebration.
You will need the following items:
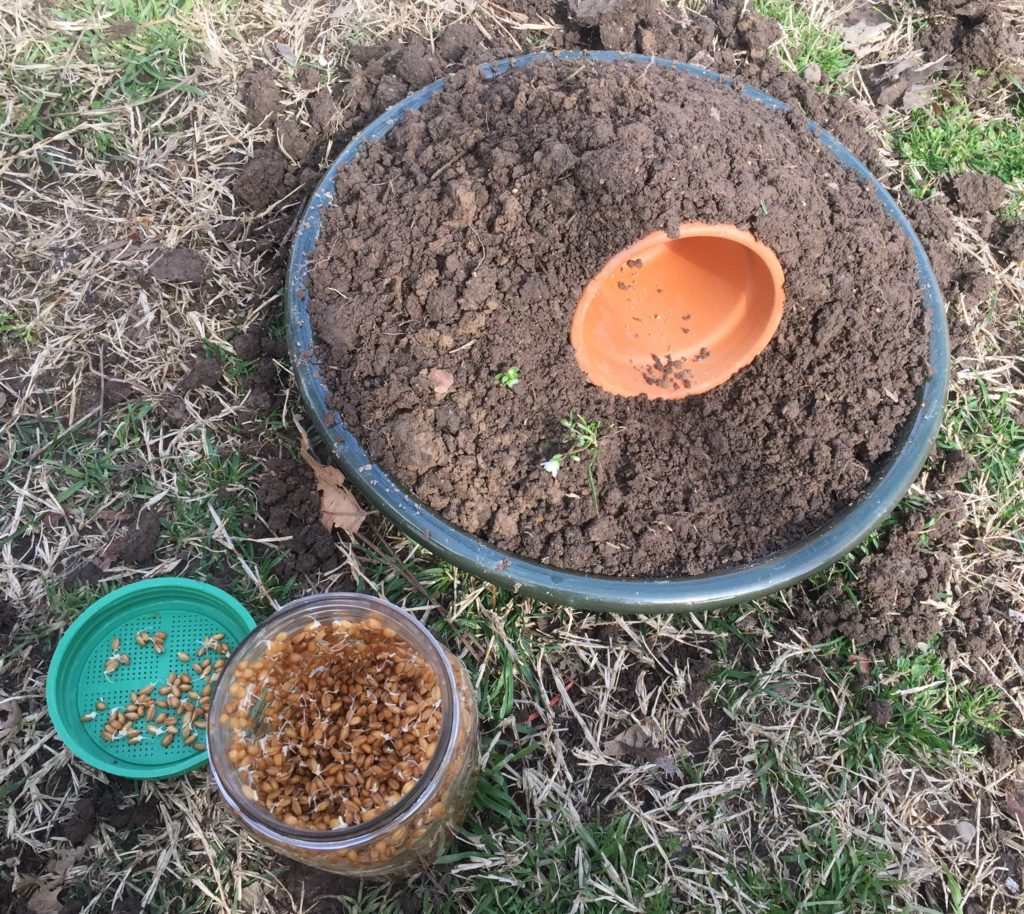
- large planter base, at least 15” in diameter
- soil
- grass seed, moss, or another fast-germinating seed (I used hard red spring wheat)
- a handful of small rocks (you can collect them out and about; I bought a small bag at the local dollar store)
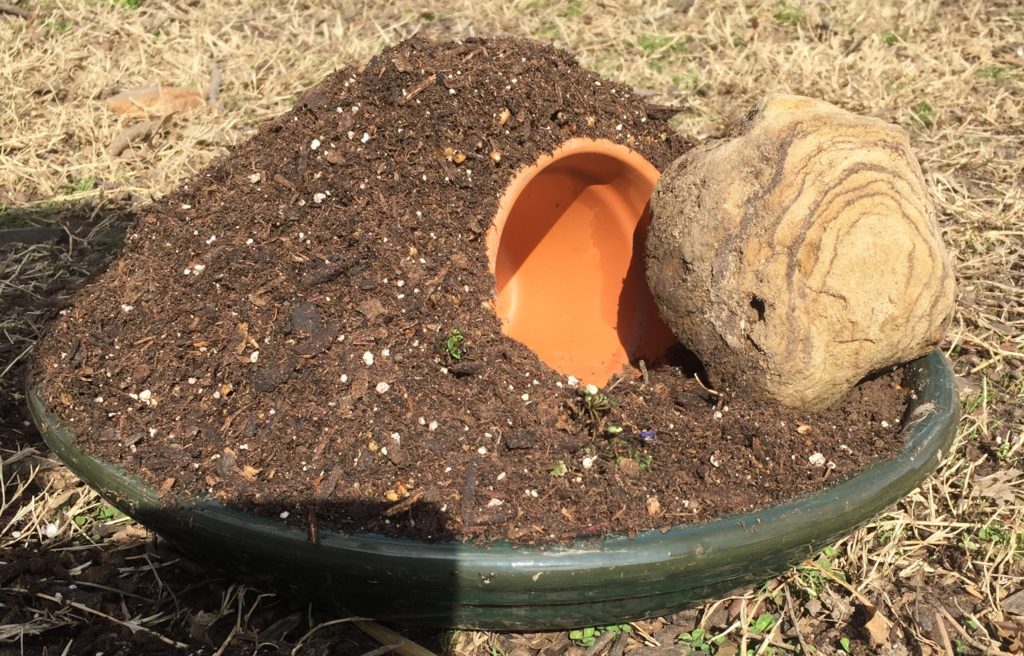
- one larger rock to look like the stone that was rolled away from the tomb
- a small clay pot about 4″ in height with a 3” mouth, to be your tomb
- a few stray twigs
- some twine
- spray bottle
Assembly:
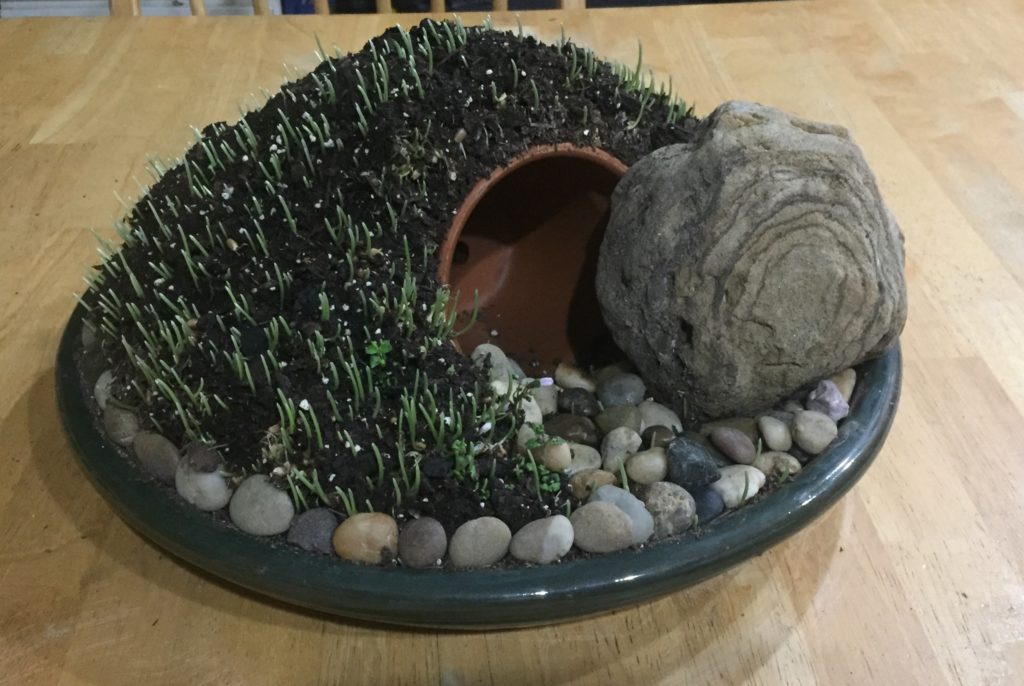
- Take your planter base and placing your “tomb” where you want it to be, mound up dirt around it to look like a hill, or your version of Golgotha.
- Place the larger rock off to the side of your clay pot tomb, to look like the stone that was rolled away at Christ’s resurrection.
- Sprinkle the soil with seeds of your choice, and lightly water or mist. I decided to use hard red spring wheat so the kids could cut it for their guinea pigs and rabbits, or juice wheatgrass juice for themselves (which, by the way, is highly beneficial to your body).
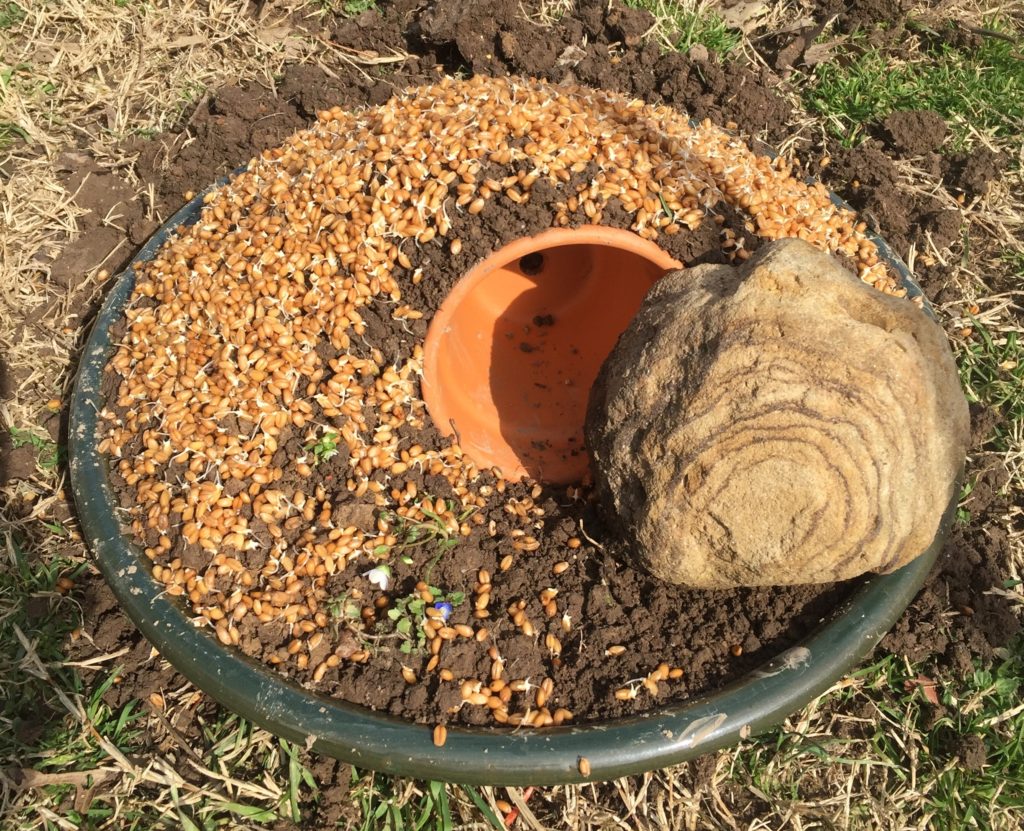 I soaked about a cup of the wheat overnight in water, then drained and rinsed it periodically for an additional 24 hours (in a container that was tipped on its side draining as it sat) until it began to sprout, as you can see in the photo. Next, I sprinkled the sprouted wheat over my soil and thinly covered it with potting soil.
 - Distribute small stones near the entrance to the “cave” and around the edges of the planter. This will help prevent any seed from sprouting up in front of the door.
- While your grass is growing be sure to keep your soil moist. I didn’t actually use a watering can to soak the soil, just a spray bottle to mist it when it looked to be drying out.
- Walk around outside and find a few straight looking sticks about 3/8” thick. Break them into appropriate sizes for your project.
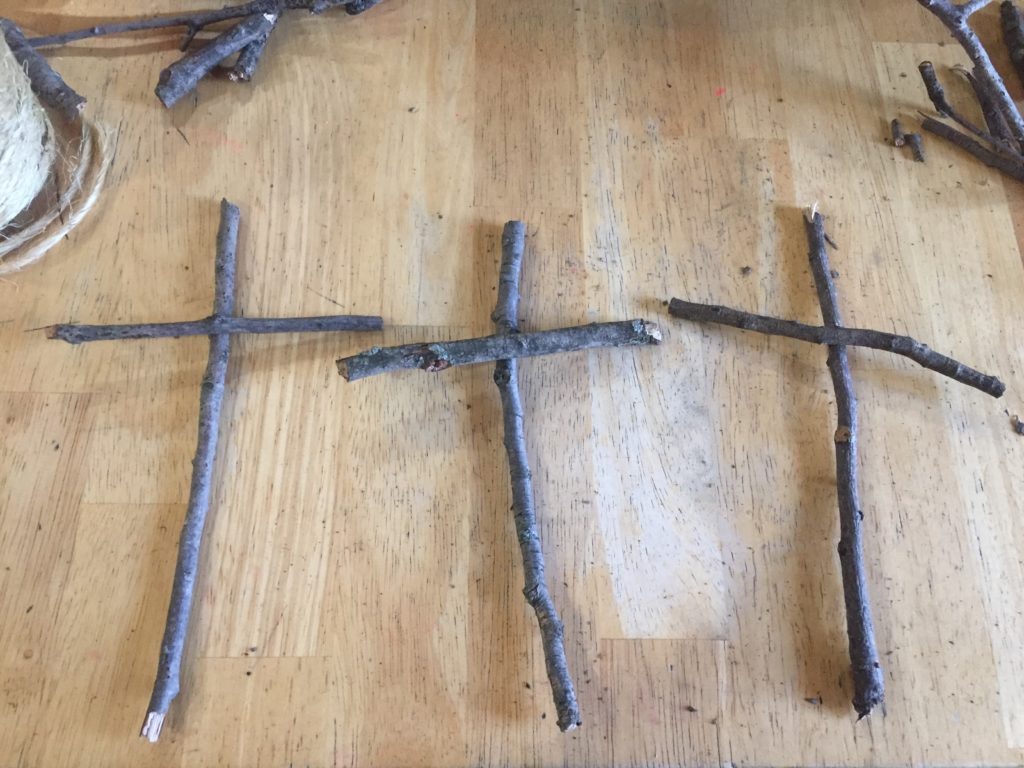 Using your twine, bind them together in the shape of a cross. Make three. You may want to have the middle one slightly taller to represent the importance of where Christ was placed, but that’s a personal preference. Gently press them into your soil where you would like them placed.
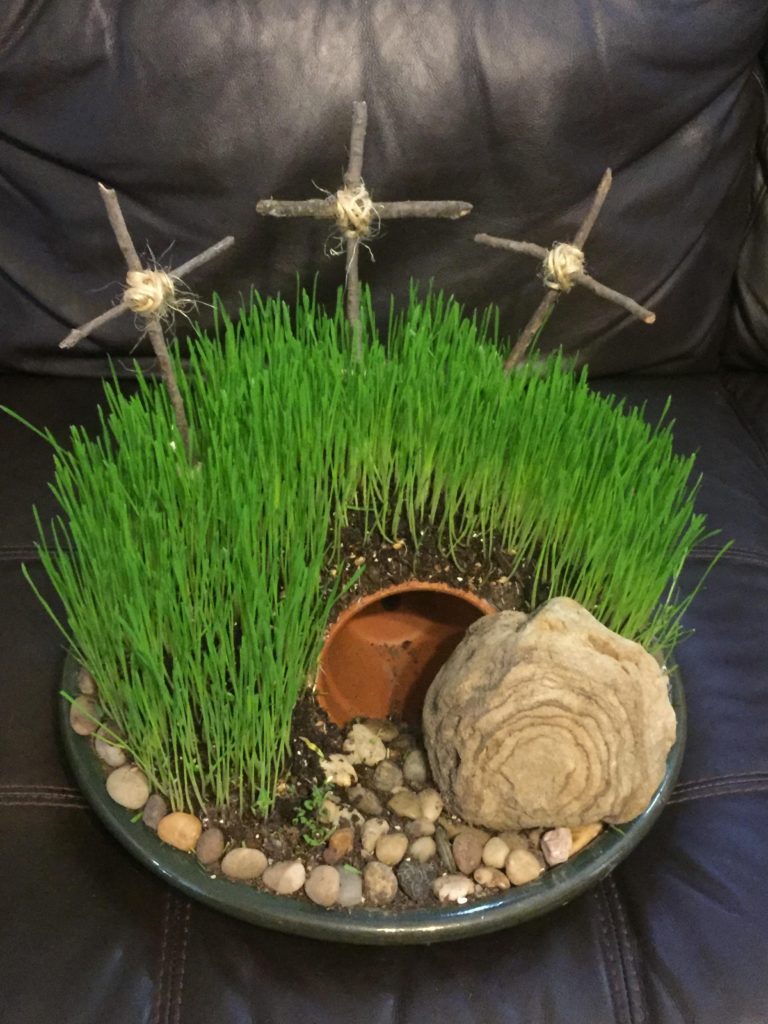
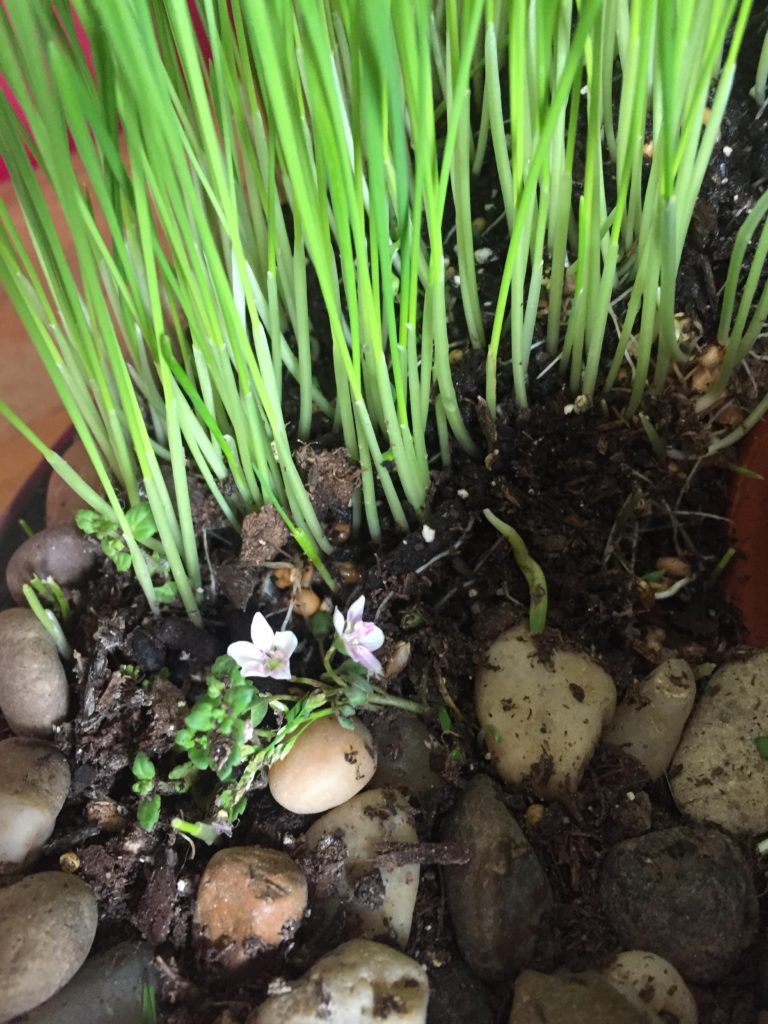
- My children found itty-bitty flowers growing out in our grass and decided to transplant them into our planter. We placed them outside the mouth of the tomb for decorative appeal.
- Keep everything moist and watch it grow into a lovely centerpiece. (Note: Depending on the seeds you choose, you might be surprised at how fast it grows. The wheat we used germinates very quickly, so it was plenty tall in about four days time.)
Blessings to you and yours this spring. Enjoy the sunshine, warmer weather, and the occasional thunderstorm. I pray you have a beautiful Easter celebration with your family.
Do you enjoy reading A Reason For Homeschool?
Please subscribe to our blog …
and be sure to LIKE us on Facebook!
![]()