“Baby, it’s cold outside” … or is it?
It’s one thing to tell my son it’s 30° outside, therefore he needs to wear a coat. It’s quite another to tell him to stand on the front porch for 10 seconds so he will believe me.
When our children see thermometers in their math books, it can be challenging for them to associate reading a thermometer with what the temperature actually feels like. So why not create a kid-friendly version of a thermometer they can adjust themselves, so they’ll successfully learn to read a thermometer and fully understand the concept while they’re at it?
That is exactly what we’re going to discuss today.
Supplies needed:
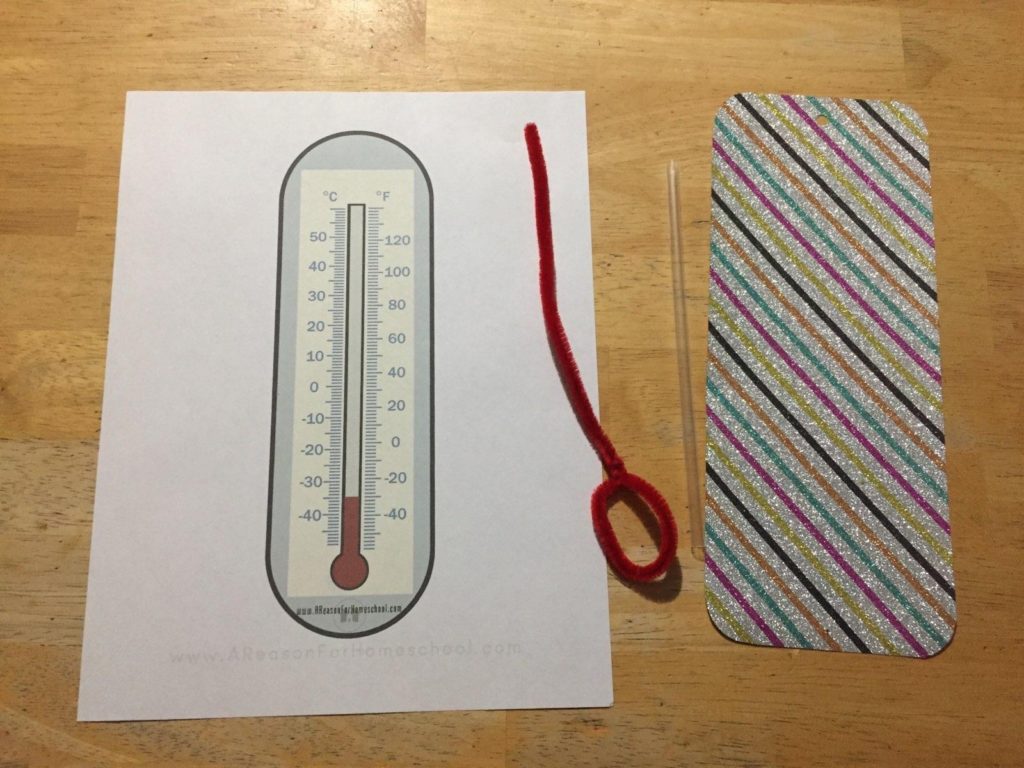
- our printable Thermometer Template
- red pipe cleaner
- clear drinking straw
- hot glue & glue gun
- paper hole punch
- decorative paper (optional)

Assembly directions:
The first thing you need is a thermometer template. Sure, we could meticulously draw one up, but that would take time … and that’s something a busy homeschool mama doesn’t have to spare. So we’ve supplied one in a free PDF download. I like that the appearance is quite realistic, which is perfect for this project. I printed mine on card stock for durability, then cut it out around the edge.
Once you have printed your thermometer, you need a clear drinking straw. I actually found locating one to be a bit of a challenge; however, many restaurants have clear drinking straws and are happy to give you a couple. I found mine at our local pizza-and-games place, Fun City. When I asked to buy two—because you never know when you will destroy one in the crafting process—the cashier graciously smiled and handed me a whole handful for free. (So, a huge shout-out to Fun City for their kind donation to my children’s education!)
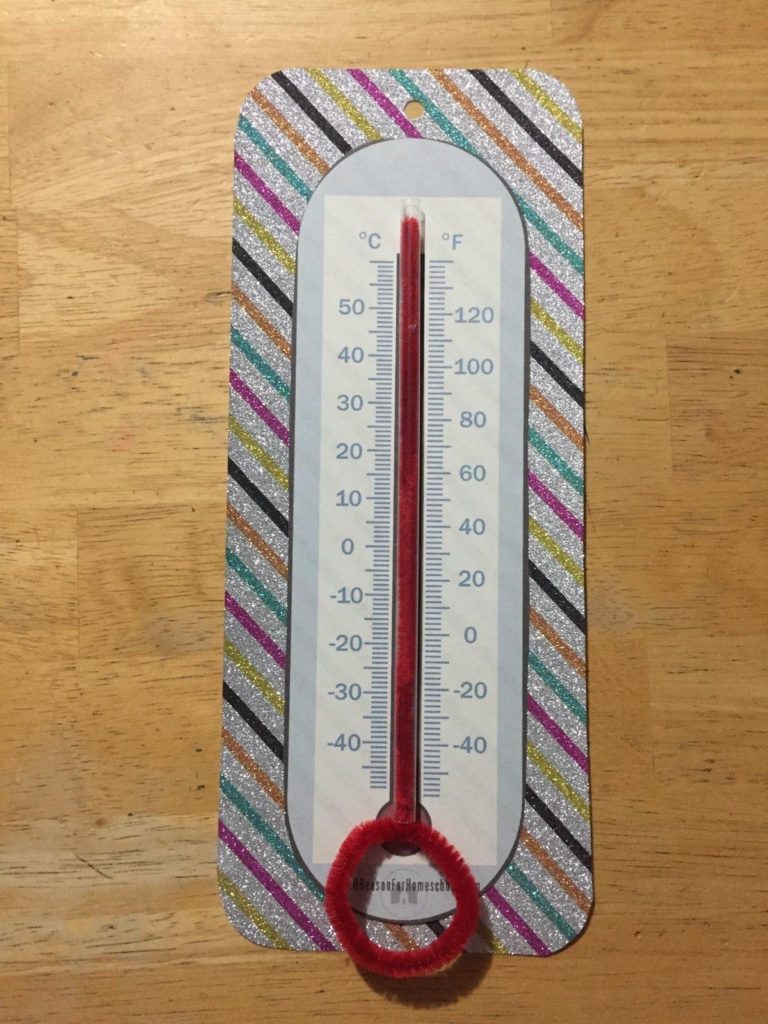
Cut the straw to fit the middle of your thermometer, and carefully hot glue it to your thermometer’s center. Insert a pipe cleaner from the bottom. The pipe cleaner replaces the mercury in a real thermometer, sliding up and down to make the “temperature” easily adjustable.
I twisted the bottom end of the pipe cleaner into a small loop, to make it easier for small fingers to push and pull it up and down to change the temperature.
Optional decorative touch: I glued my thermometer onto a fancy piece of glittery paper to add sparkle appeal, punched a hole in the top, and hung it on a nail low enough for my six-year old to reach.
Educational possibilities:
The fun part! Making it relevant to your child’s life.
- They can adjust it daily and keep a record of their weekly temperatures. You could even turn this into a bar graph, depending on the child’s age. Maybe you will soon have a budding meteorologist on your hands!
- You adjust the thermometer, and ask them to read the temperatures you set.
- Make flashcards with images of different types of clothing. For example, make cards showing sweaters, jackets, gloves, long-sleeved or short-sleeved shirts, swimsuits, shorts, long pants etc. Then, after explaining how lower temperatures are cold, and higher ones get warmer, they can set the most likely temperature for each item of clothing.
- Gather a collection of actual clothing items (or doll clothes) and let your child play dress-up with them, dressing either himself or a doll, following the same idea for #3.
- If you happen to have both outdoor and indoor thermometers, let your child check the temperature of both and compare the difference.
- Make a guessing game of it: before going to bed, have him set the thermometer to the temperature he thinks it might be the next day, then check to see if his guess was accurate!
However you choose to use it, your homemade “thermometer” is bound to be more fun than reading temperatures in their math book. Keep your lessons short and sweet, and make them fun … it’s guaranteed to be a hit!
Download and print your own
thermometer template for this activity:
Thermometer Template
