For many of us, this Father’s Day will be unlike any in memory. Life may be returning to normal in some ways, but you might understandably be a little skittish about large family gatherings — especially getting together with older generations who might be more susceptible to illness. If you’re planning a quiet day at home, this DIY birdhouse project is a fun, inexpensive way for kids to spend time with their favorite guy. For about $5 in supplies and a small investment of time, you can create a cozy home for some feathered friends, and (more importantly) memories that will last far beyond Father’s Day.
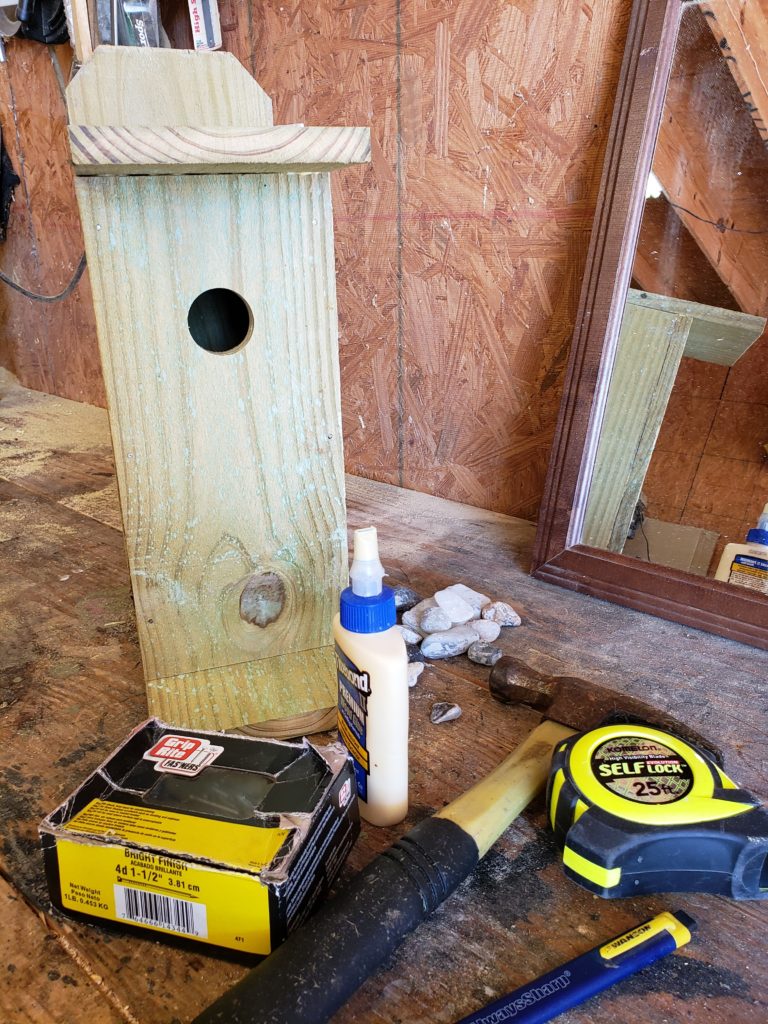
Supplies needed:
- one 6′ x 5.5″ cedar fence picket
- 24 x 1.5″ finishing nails
- hammer
- power miter saw (or circular saw)
- wood glue (optional)
- power drill with 1.5″ forstner bit OR hole saw (for making the entry to the birdhouse)
Cutting the picket into sections:
Beginning at the dog-eared end of the cedar picket, measure and mark a 16″ length of picket. Using a power miter saw — if you don’t have one, you can use a circular saw — carefully cut the 16″ section of picket. This will be the back of your birdhouse.
Next, measure and cut three 12″ sections of picket. Because these are the front and sides of the birdhouse, it’s important that all of them be the same length. To achieve this, you can measure the first section, then use it as a guide for cutting the other two. When all three pieces are cut, carefully stack them with one end precisely lined up, hold them tightly, then use the miter saw to cut through all three pieces of wood at the same time. (If the pieces are slightly longer or shorter than 12″, that matters far less than all being the same length.)
Next, measure and cut two 9″ sections of picket. These will be the top and bottom of the birdhouse. It’s not as important that these pieces be exactly the same length. When you are finished cutting, you should have a very small piece of picket left over — just under 2″.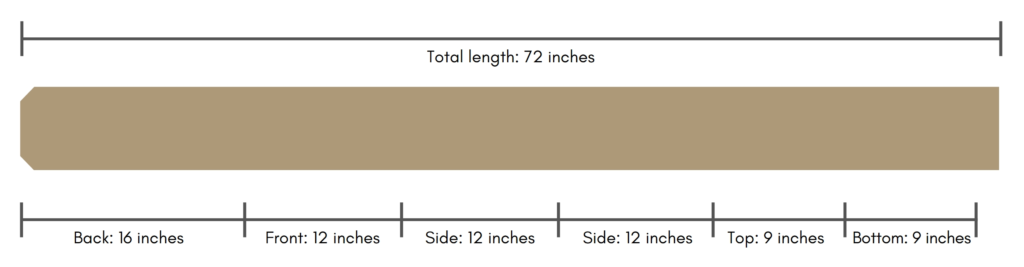
Choose one of the 12″ sections of picket. Measure about 3″ from the end of the wood, then find and mark the center. This is where you will drill the hole for the door to the birdhouse, using a power drill with a forstner bit or hole saw attachment.  Assembling the birdhouse:
At this stage, assembly might be a bit difficult for younger kids, so you definitely want to have an extra set of hands to steady things (or do this first step ahead of time).
Gather the remaining two 12″ sections (the sides of your birdhouse) and one 9″ section for the bottom. Line up one end of the 9″ section flush with the short ends of the 12″ sections. There will be a 3.5″ overhang on one side, which will serve as a perch at the bottom of the birdhouse. Apply a bead of wood glue if you are using it, then hammer in finishing nails (we used 3 on each side) to attach the sections together as shown:
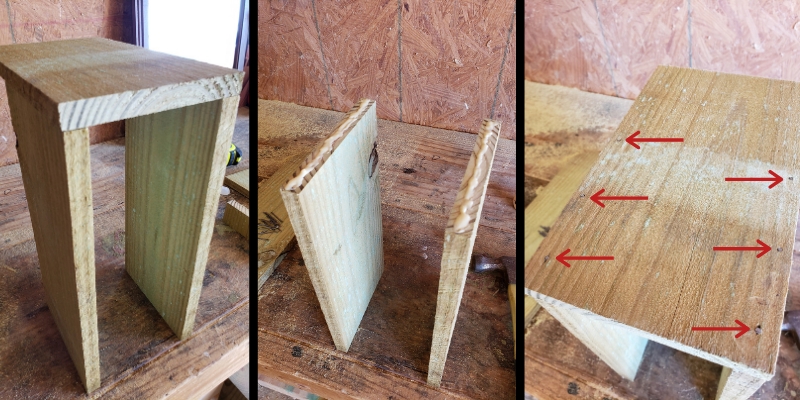
Next, you’ll attach the front of the birdhouse. Place the assembled pieces on your work surface, with the longest sides touching the table. (Helpful hint: remember that tiny scrap of picket left over when you finished cutting? Measure the inside distance between the two attached sides, then trim the piece of scrap wood to serve as a spacer to keep the sides from moving out of alignment as you attach the front of the birdhouse.) Add a bead of wood glue along the top edge where you will be nailing on the front piece. Then, line up the edges carefully and use nails to attach the front, making sure that the hole is closest to the open end. Because the frame of the birdhouse is beginning to be a bit more stable, this is a good time for younger kids to start taking over some of the assembly. You might consider adding a small “guide” hole for nails (see below) or — for dad’s smallest helpers — pounding in the nail most of the way and letting the little ones finish up.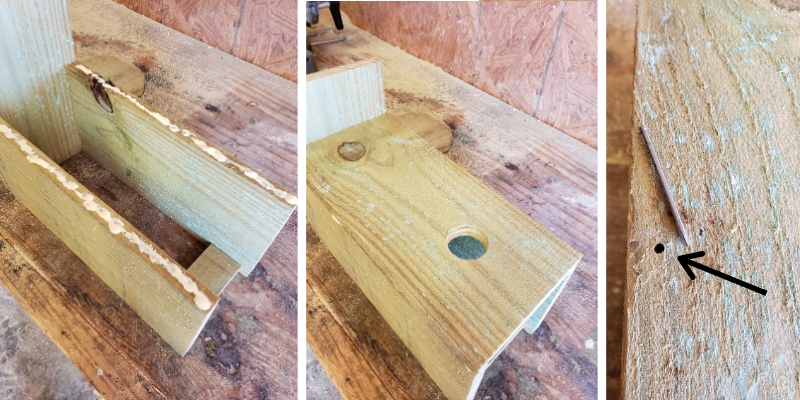
Now that the bottom, sides, and front of the birdhouse are assembled, it’s time to move on to attaching the back. Flip over the frame, allowing the bottom perch to hang over the edge of your work surface. As before, you’ll want to add a bead of wood glue if you are using it. Line up the straight edge of the 16″ bottom piece with the square bottom edge of the birdhouse. The dog-eared end of the picket will extend several inches past the sides. Hold the sides steady as you nail the back to the rest of the birdhouse.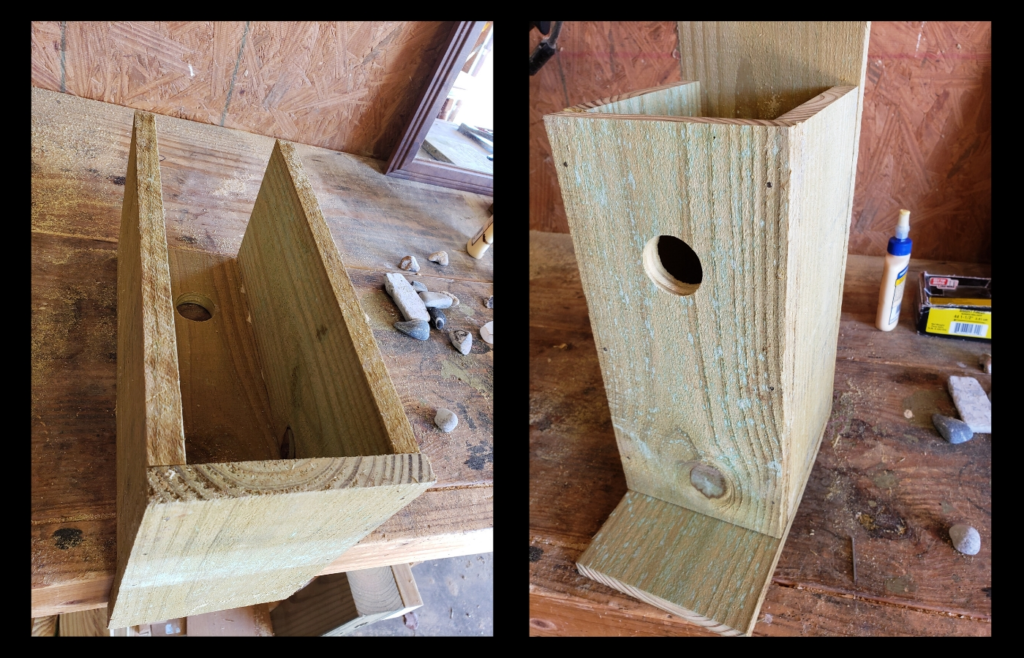 The final step: attaching the top piece to provide a roof to keep your family of birds safe and dry. If you are using wood glue, make one last pass around the top edge before nailing on the final 9″ piece of wood.
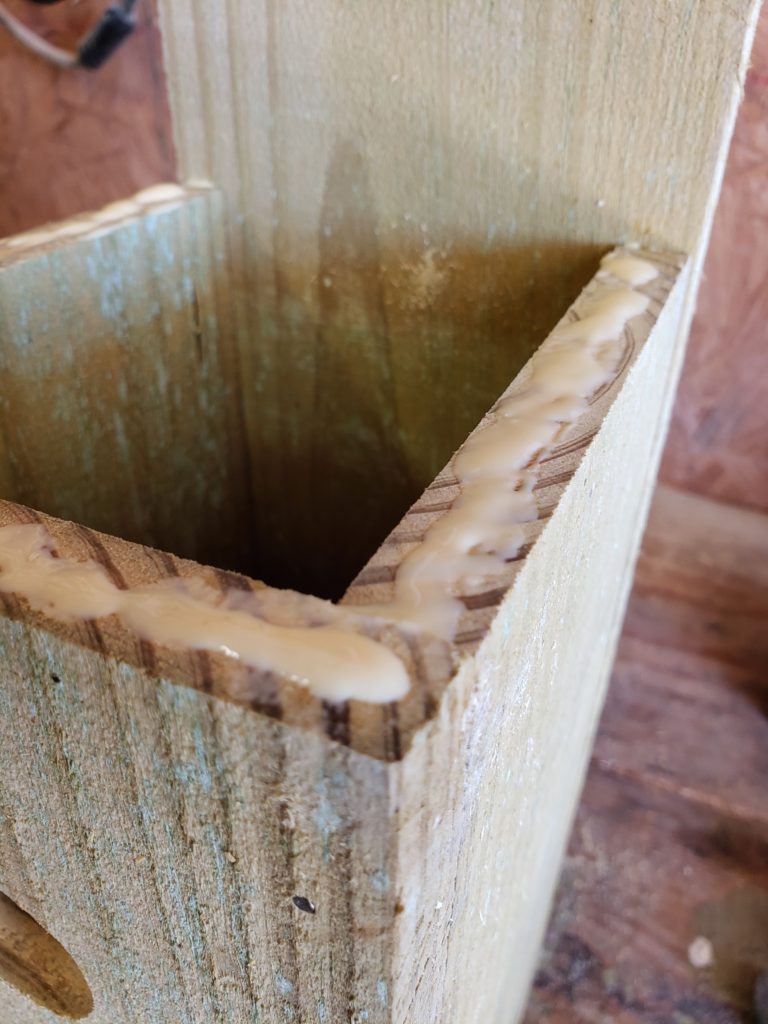
 This house is a great size to host many smaller birds. To mount the birdhouse, consider drilling a hole near the top of the 16″ board, or simply drive a large nail through the board into a tree, shed, or fence post. Hanging the birdhouse roughly 6′-8′ from the ground will work well for most species. The overhang provides some protection from the elements and gives the birds a place to rest as they’re flying back and forth to their nest. (Think of it as the bird equivalent of taking those extra 3 minutes in the shower while your kids shove notes under the door.)
This Father’s Day might be different from the norm … but that’s all the more reason why nothing should prevent us from creating memories that will last a lifetime.
Blessings to you and your family this Father’s Day!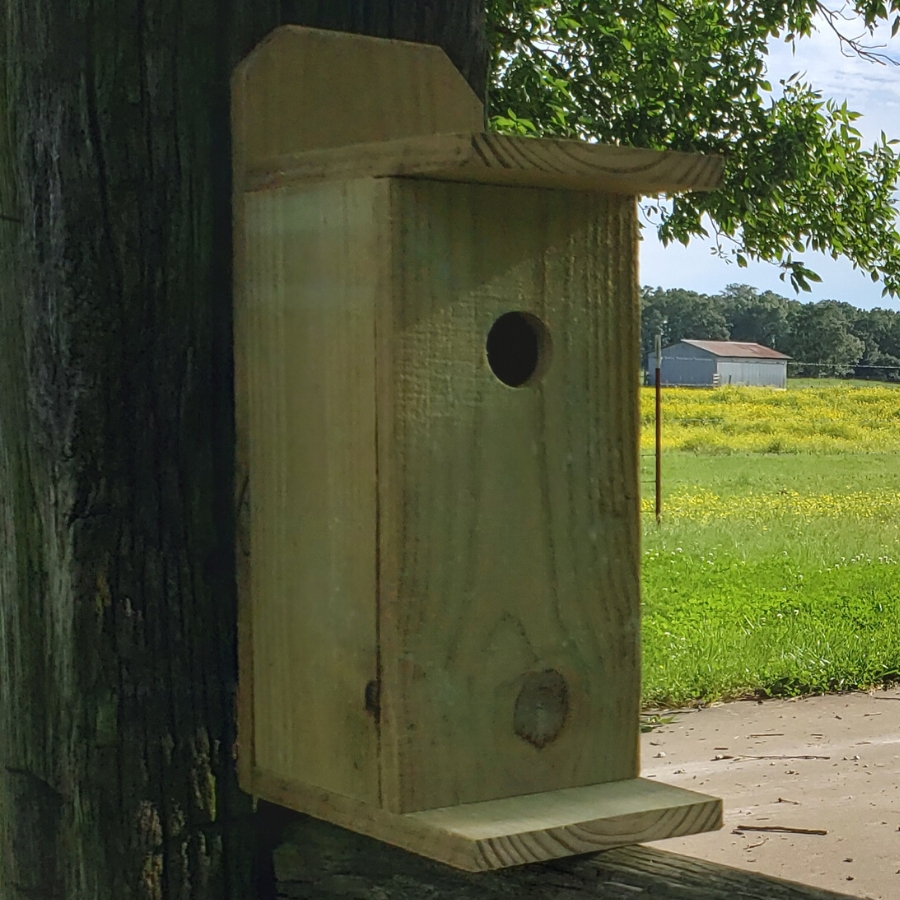
Download FREE printable instructions for this project,
including a supply list, cut diagram, & step-by-step assembly info:
DIY Cedar Picket Birdhouse Instructions
Find more ideas for celebrating Father’s Day:
Laura’s Top Ten: Father’s Day
DIY Backyard Swing Makeover
Father’s Day Photo Frame
Father’s Day Dinner: Herbed Pork Loin with Oven-Roasted Vegetables
Father’s Day Dessert: Mississippi Mud Cake