Tomorrow, March 6th, is National Frozen Food Day — an occasion observed since 1984, when the late Ronald W. Reagan declared it into existence with Presidential Proclamation 5157.
If you’re like most busy moms, you probably can’t imagine life without your freezer. For some of us, the issue is an OVERstocked freezer, so full of food that we might forget what’s in there (and the reason why “freezer inventory” made the cut as one of the monthly tasks on our ‘Do It’ List)!
The convenience and economy of buying in bulk and stashing food in the freezer has become part of our everyday lives, but it certainly hasn’t always been that way. A century ago, the self-contained refrigerator had not even been invented. Ten years later, in 1930, 8% of American homes had refrigeration … but units with a separate freezer compartment weren’t introduced until 1940. The first commercial frozen meals became available in 1954: pre-cooked “TV dinners” made by Swanson (which still had to be heated in an oven, because microwaves did not exist at that time). Hard to imagine those days, when you walk down the freezer aisle in your local grocery store!
Today’s convenience comes with a trade-off, though. Frozen meals often contain higher amounts of sodium, fat, and calories than their homemade counterparts, and they are generally more expensive than preparing meals at home. Even the “healthy” meals in the freezer case, with more controlled fat and calories, can contain high levels of salt. (After all, something has to replace the fat and calories if the meal is going to taste good, and salt is far less expensive than many spices that could be used to flavor the food instead.)
So what’s a busy homeschool mom to do? We’d like to suggest an alternative to stocking up on Stouffer’s: making your own freezer meals at home. You know exactly what’s going in them, you don’t have to worry about factory contamination or recalls, you’re putting food on the table at a fraction of the price of eating out or buying frozen meals, and there’s a good chance it’s healthier, to0. In other words, you rock!
To get you started on the path to stocking the freezer with YOUR favorites, we’re sharing a few of OURS today. All of these make enough for a larger family, so if you’re cooking for fewer people, you’re already ahead of the freezer meal game … without even needing to double a recipe. We hope you’ll try one (or all) of them, then come back to leave a comment and let us know whether these were hits or misses at your house!
Veggie Pot Pie from Bridgitt
I’ve written about how much I love planning and preparing meals ahead of time (see my Meal Planning post from all the way back in August 2017!) … it’s a huge time saver for a mom with a busy homeschooling/ballet/volleyball/piano-and-everything-else schedule! Bonus: my kids are always happy to help out in the kitchen if it means they get to eat what THEY choose during the week. One of our favorites to prepare ahead and pop in the freezer is this easy, meatless version of pot pie. This recipe can easily be doubled or tripled if you’re cooking for a crowd.
Ingredients:
- 3 c. (approximately) diced potatoes
- 3 c. (approximately) chopped carrots
- 1 large onion, chopped
- 4 Tbsp. butter
- 1/2 c. flour
- 2 Tbsp. McKay’s chicken seasoning
- 4 c. milk (approximately)
- Refrigerated pie crust(s)
Begin by chopping your veggies. Measurements on the potatoes and carrots are approximate; you just want to be close to 3 c. of each, but don’t feel the need to pull out an extra potato. Feel free to change up the vegetables, too — peas, broccoli, and sweet potatoes all seem like they’d be yummy if your family prefers those, or you can just use up what’s in season if you have a garden.
Steam the potatoes and carrots until they are tender.
In a separate pan, melt 4 Tbsp. of butter, add the chopped onion, and sauté until the onion starts to look translucent. Stir in 1/2 c. flour and 2 Tbsp. of McKay’s chicken seasoning until well combined, then cook a minute or two. Slowly add in milk — about 4 c. total — and whisk constantly to combine it with the onion and flour mixture. Continue whisking until it makes a thick sauce, then add salt and pepper to taste.
For a pot pie to serve the whole family, dump the steamed veggies into a casserole dish (or divide it between two … you can have one now and freeze one for later!) then pour the sauce over the veggies. Add a pie crust on top — I carve designs into my crust if I’m in a creative mood — and bake for about 15-20 minutes, or whatever your pie crust calls for.
TO FREEZE: Once assembled, cool the unbaked pot pie in the refrigerator. Once it’s fully cooled, wrap tightly in foil or plastic wrap, then place in the freezer. The pot pie doesn’t need to be taken out to thaw before baking. Just place it straight into the oven and adjust your cooking time; it’s done when the crust is brown and the filling is bubbling. (If you’ve frozen your pot pie in a glass dish, place it in a cold oven, then set it to your baking temperature to avoid breakage.)
To make individual pot pies: My kids always want a bottom crust on their pot pies, so I’m sure to get extra if they’re making these. They prep the crust in oven-safe mini pie pans while the veggies are steaming and the sauce is coming together, then we combine the veggies and sauce in a single pan. They spoon the filling into their pie pans, add the top crust, then we chill and freeze the individual pot pies for later. Preparing these together is a great rainy weekend activity — their hands stay busy, and this mama’s always happy to have homemade meals in the freezer! 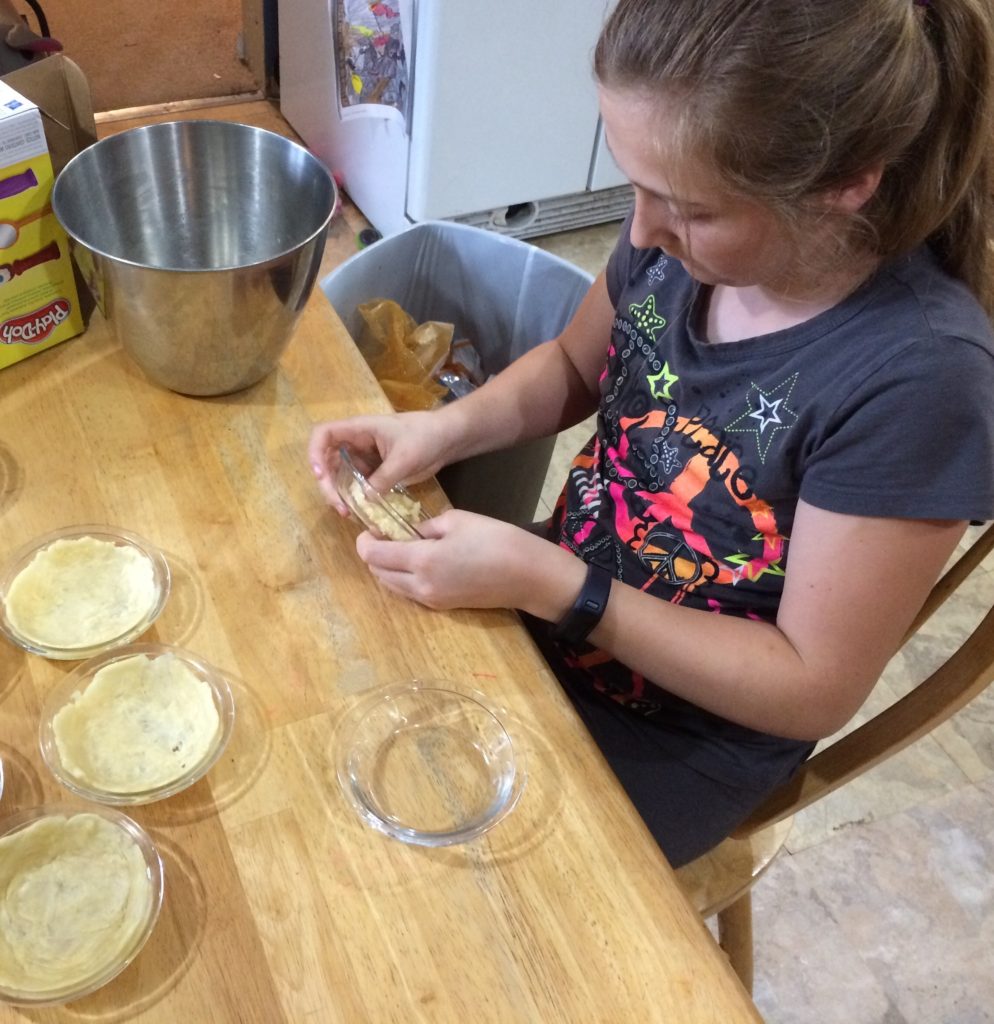
Green-Chili-Chicken Enchiladas from Laura
When my children were all home, I often used the weekends to make meals ahead and stash in the freezer for busy school days. Now that my husband and I are empty nesters, I still like to prepare ahead and freeze meals, so that I can enjoy the time my kids are home and still feed everyone well. Knowing we have dinner in the freezer is a blessing to moms in every season.
Our name may be Scottish, but the Macfarlans love Mexican food! I’ve tweaked and adjusted this recipe through the years, and it’s become a family favorite. When I ask our adult children for requests when they come home, this one is always on the list! The best part is that it is not only easy to prepare, but also freezes well.
Ingredients:
- 5 chicken breasts
- Olive oil
- Southwest, Taco, or Fajita Seasoning (for a gluten-free taco seasoning without added salt, try Beth’s Taco Spice Mix)
- 1 ¼ cups chopped onions
- Chili powder
- 8-12 10-inch tortillas (or a greater number of small size)
- 3 cups grated cheddar cheese (reserve 1 cup)
- 1 10 ¾ oz can condensed cream of chicken soup
- 1 ½ cups sour cream
- 4 oz. Can diced mild green chilies
Preheat oven to 350° F. Drizzle olive oil over chicken. Sprinkle on seasoning. Cover with foil and bake for 50 minutes. Remove from oven. Allow to cool and dice into ½-inch pieces.
Spray a 13 x 9 x 2-inch with nonstick spray. Spoon chicken down center of each tortilla. Sprinkle with chili powder. Spoon onions over chicken and sprinkle cheese on top. Roll up tortilla and place seam-side down in the baking dish. (To speed this up, I often make my own assembly line by laying out the tortillas along my counter. Then I add chicken to all, followed by chili powder, then onions and finally cheese.)
When tortillas are completed, create a sauce by combining soup, sour cream and green chilies. Spread over tortillas, being careful to cover all edges.
TO FREEZE: Cover with heavy duty foil and freeze in the baking dish. Reserved cheese should be frozen in a separate container or zipper bag.
To prepare: Allow to thaw completely in the refrigerator before heating. After thawing, bake uncovered in a preheated 375° F oven for 15 minutes. Remove from oven, sprinkle reserved cheese on top, and bake an additional 10 minutes.
Serve with rice, refried beans, side salad, and/or chips and salsa.
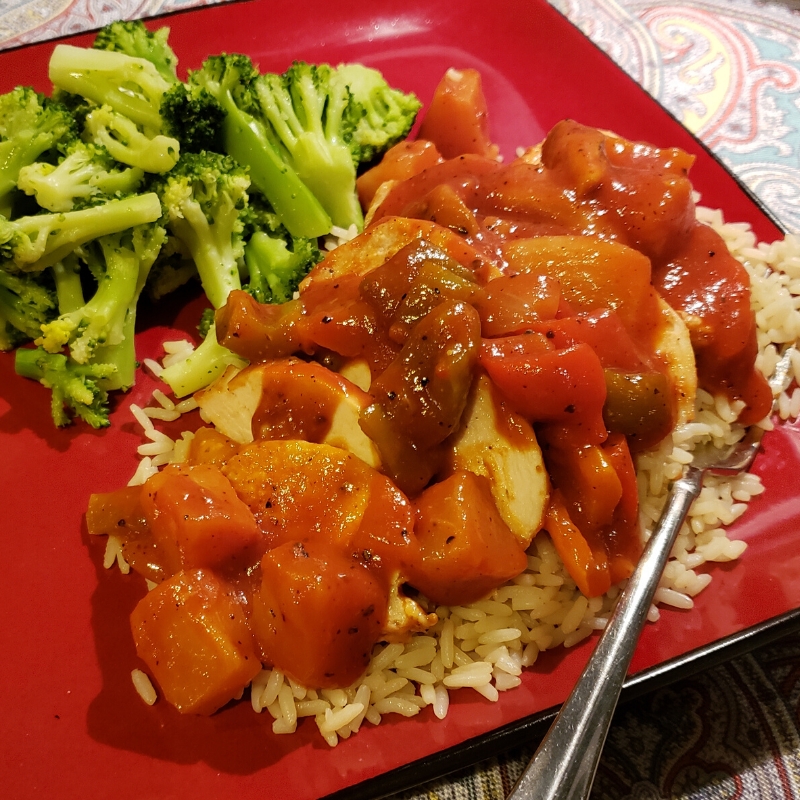
Hawaiian Chicken from Beth
This is adapted from a recipe by Taste of Home, which was originally published as “Chicken Aloha” in the September/October 1991 issue of Country Woman magazine — so it’s definitely time-tested! I modified the original by increasing the vegetables and pineapple, playing with the spices to suit our tastes, and substituting other ingredients for ketchup and condensed tomato soup (to eliminate gluten, as well as excess salt and additives).
Ingredients:
- 6-8 boneless, skinless chicken breasts (roughly 3 lbs.)
- 2 Tbsp. corn starch
- 1 tsp. kosher salt
- 1/2 tsp. ground black pepper
- 1 tsp. garlic powder
- 1/4 tsp. celery seed
- 1/2 c. packed brown sugar (I prefer the dark brown)
- 1 c. tomato sauce
- 1 Tbsp. Worcestershire sauce (both French’s and Lea & Perrins brands are gluten free, as are some others — please read the label if your meals must be GF)
- 1 Tbsp. prepared spicy brown mustard
- 1/3 c. apple cider vinegar
- 1 – 20-oz. can pineapple chunks in unsweetened pineapple juice
- 1 green pepper, cut into good-sized pieces
- 1 red pepper, cut into good-sized pieces
- 1 small (or 1/2 large) onion, chopped
Preheat oven to 375° F and grease a 9×13 baking dish with olive oil or non-stick spray. Blot the chicken dry with a paper towel, then salt and lightly pepper on both sides. Place in the bottom of the dish.
Chop the onion and peppers, and set aside. (Note: it’s fine to omit or increase the onions and peppers to suit your family’s tastes.) Drain the pineapple chunks and reserve the juice.
In a mixing bowl, measure out the corn starch, kosher salt, black pepper, garlic powder, celery seed, and brown sugar, and stir to combine. To the dry mixture, add the reserved pineapple juice, tomato sauce, Worcestershire sauce, and mustard. Whisk the ingredients together until they are well combined.
Add the pineapple chunks and chopped vegetables, and stir until the liquid coats all the pieces.
TO FREEZE: While we also freeze complete meals that can go straight into the oven or slow cooker, for this recipe I prefer to simply prepare the sauce — peppers, onions, and pineapple included — ahead of time, and freeze it all in a heavy zipper bag without the chicken. That way, it thaws MUCH more quickly when removed from the freezer, and you can simply pour it over chicken, pop in the oven, and prepare your sides while it’s baking. Consider making a double batch of sauce any time you serve this, then freezing half for later. So convenient!
To prepare: Pour the sauce over chicken breasts, spreading the vegetable and pineapple pieces fairly evenly, and bake at 375° F until the chicken reaches an internal temperature of 165° F. Depending on the size of your chicken breasts and whether they just came out of the fridge, this can take anywhere from 30 minutes to an hour. Cutting the chicken into smaller pieces can reduce the oven time; just be sure to check regularly to prevent dry, overcooked meat.
My kids love boneless, skinless chicken thighs so we also use those, with increased cooking time to be sure the chicken reaches 165° F. (Chicken thighs are also a great option if you’d like to make this in your slow cooker. The dark meat stays more moist than chicken breasts prepared in the crock pot.)
I suggest serving over rice, with steamed broccoli or edamame as a side dish.